
Friday, September 23, 2011


Thursday, September 8, 2011
Potato Chips in the Microwave?
Yes, you read that right. I made homemade potato chips using the microwave. No messy deep fryer or standing in front of a greasy skillet.

I was skeptical too when I was researching ways to make potato chips on-line. I figured I give it a try, and the results were extremely yummy. Call me a believer. The boys loved them and I think I made 5 potatoes worth last night to go with our pulled pork sandwiches. I even made some for my hubby’s lunch today.
All you need are potatoes, a little oil and salt. Oh, and a microwave. The recipe will be at the end of this post
Take 2 potatoes and scrub clean for skin on chips. Or you can peel them, but that is more labor intensive, and besides, the skins are good for you!
Using a mandolin slicer, food processor, or box grater, slice potatoes paper-thin. I like to throw them in some water and pat dry, so they don’t turn that pink color from all the starch.

Place sliced potatoes in a plastic container or ziploc bag with about 2 Tbsp of canola oil and toss to coat. You can also use olive oil or vegetable oil, which ever you prefer.
I just sprayed the glass plate in my microwave with Pam or you can use parchment paper. And arrange potato slices in a single layer

Now heating time may vary depending on your microwave. Some folks said 3-5 minutes, but my microwave took 8 minutes for them to brown. Start with the lowest setting and keep checking to make sure they brown.

(Make sure they a re lightly browned or they won’t crisp up. )

Once potatoes are lightly browned, remove them from the microwave onto a plate. Sprinkle with sea salt, or your favorite seasoning. You could use Cajun seasoning, dried herbs like thyme or dill, even chili powder. Repeat with remaining potato slices. I had to spray my microwave plate with Pam a couple more times, as they tended to stick after a couple of batches.
As they cool they will crisp up. Now you have delicious, homemade potato chips with no chemicals, preservatives or tons of fat.

It took me about 30 minutes or so to make enough for the boys, but I didn’t have to stand there and watch the whole time. And, my house does not smell like a grease, a huge plus. Try it tonight or when you have a craving for something starchy and salty :)
Microwave Potato Chips
Ingredients
- 2 tablespoons canola oil
- 2 potatoes, sliced paper thin with or without skin
- 1/2 teaspoon sea salt, or to taste
Directions
- Pour the canola oil into a plastic bag or plastic container. Add the potato slices, and shake to coat.
- Coat a large dinner plate lightly with oil or cooking spray. Arrange potato slices in a single layer on the dish. I just sprayed the glass plate in my microwave with Pam or you can use parchment paper.
- Cook in the microwave for 5-7 minutes, or until lightly browned (if not browned, they will not become crisp). Times will vary depending on the power of your microwave. Remove chips from plate, and toss with sea salt. Let cool. Repeat with the remaining potato slices.
Monday, August 29, 2011
Oh Happy Day!
I walked out to my mailbox this afternoon, and there, amongst the bills, store flyers and pre-approved credit card offers, was a thing of beauty…

My order from Sublime Stitching!

I love Jenny Hart at Sublime Stitching. She is the reason I started embroidering. Her patterns are so fun and her instructions are so easy to follow. Last week, Jenny announced on Facebook that she was having a BIG ♥ HONKIN' ♥ SALE!
Holy smokes, patterns were 50% off! I called my daughter, J* and told her to get her booty online and start shopping. After adding one of everything to my cart, I realized I had to show some restraint :( After many hours of deliberation, I finally decided on the following patterns.

J* had even a harder time that I did, and finally decided on 8 patterns. Hers are all different than the ones I bought, so now we can borrow from each other.
We met Jenny Hart at the Renegade Craft Fair in Los Angeles this summer. She was so nice, so was her mother. And, while we were there, my daughter bought me the Golden Dragon scissors I had been drooling over.

There are awesome, I am in love with them. I cannot wait to start embroidering. I have some ideas for Christmas presents this year and the patterns will make them amazing.
Tuesday, August 23, 2011
We're Jammin
We're jammin', we're jammin', we're jammin', we're jammin'
I hope you like jammin', too.
I have lived in this house for 4 years. For three of those years, we have let the birds, squirrels, rabbits, and whatever other critters are hiding around here do what they will with all the fruit from our apple & pear trees and grape vines. Sometimes an Amish family comes in early Fall/late Summer and they trade handmade breads, cookies, jams, and jellies for the opportunity to pick whatever fruit happens to be ready.
This year, I asked myself, “ Why do the Amish get to have all the fun?’ I decided to make homemade jam with the grapes from my own backyard. I researched different grape jam recipes. ( ie. wasted several hours in front of the computer browsing the Internet ) Now there are lots of recipes out there, using store bought grape juice… but if you are going to all the trouble to make and can your own preserves/jam/jelly, why not use fresh, in season produce?!
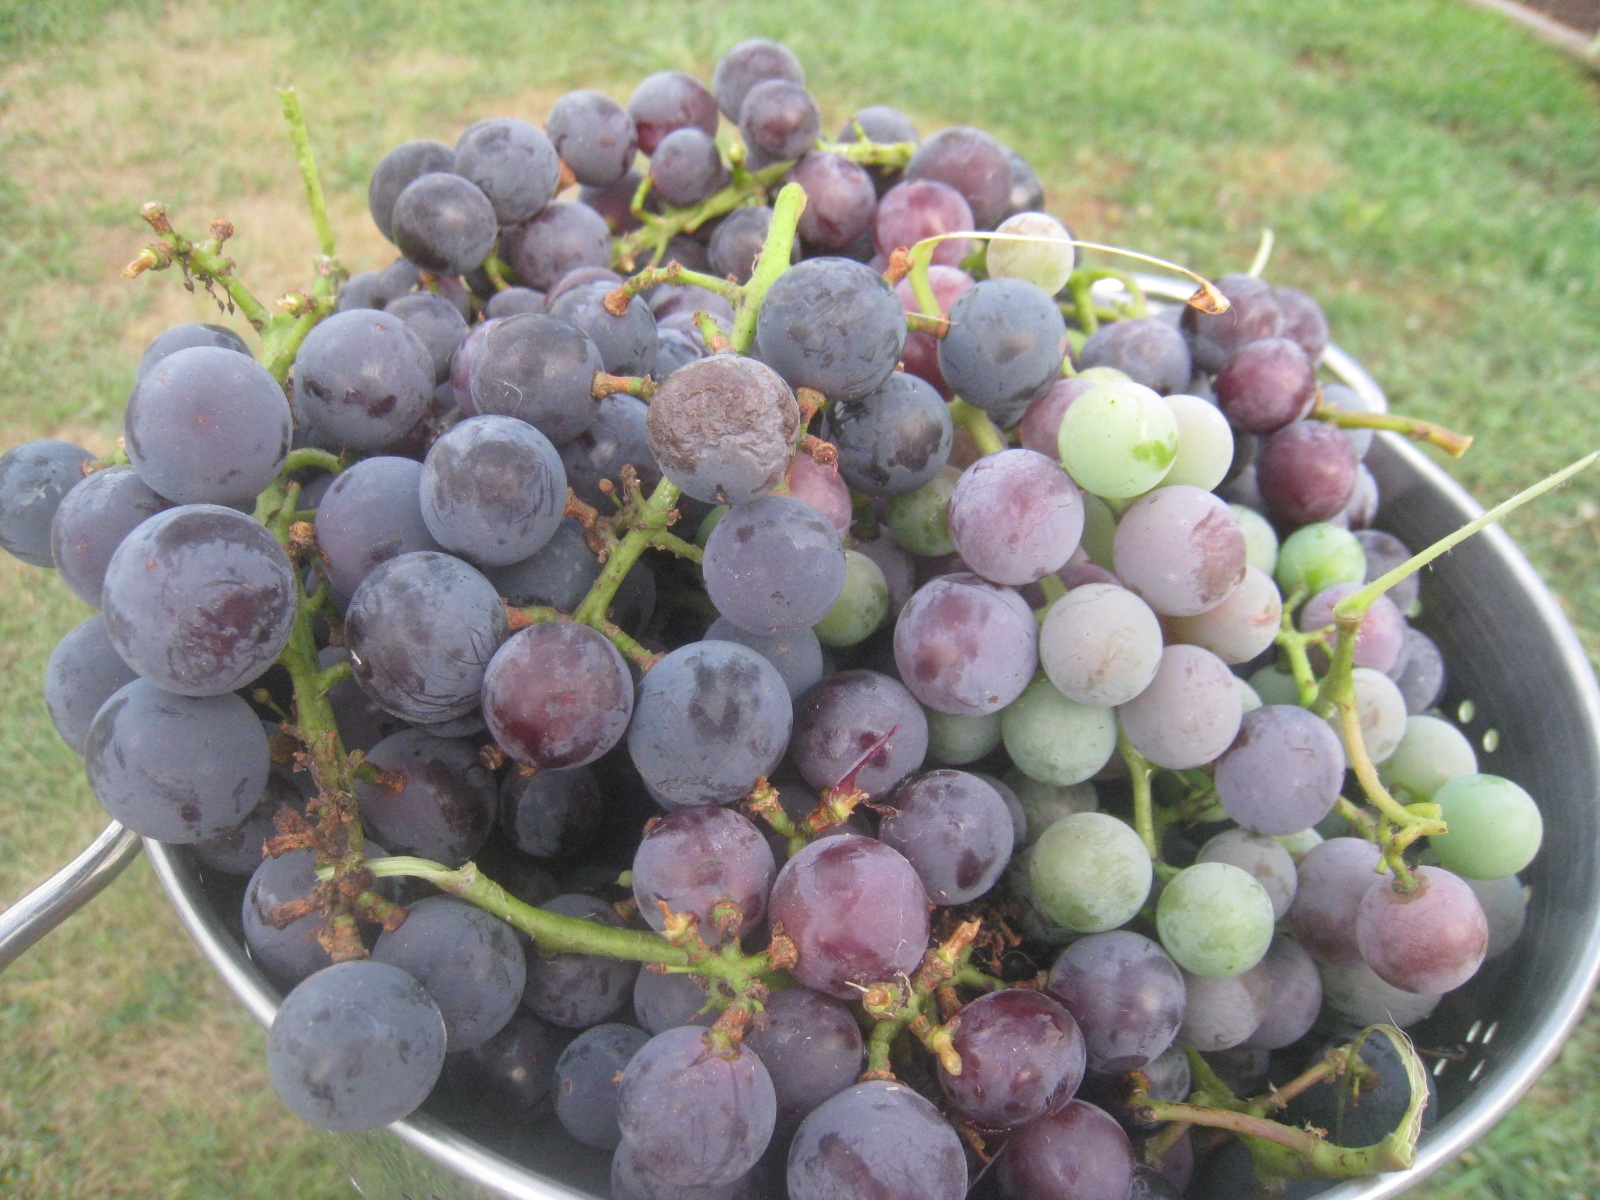
Anywho, I have tons of grapes outside, just begging to be picked.

I am not sure what kind of grapes these are, they came with the house. But my guess is concord. When ripe, they are a dark purple. No one at our house likes to eat them, they have thick skins and big seeds inside them. But the pulp is very sweet, and they are organic. (We do nothing to them, they just get rained on occasionally and enjoy the sunshine)
And wouldn’t you know it, the next day the Amish came by and wanted to pick some grapes. So, my 3 year old son, G, and I picked a big basketful of grapes before they came back the next day. He had a great time and I would suggest if you have access to a pick your own vineyard, take the kids!
We made sure we had about 1 cup worth of not quite ripe grapes too. I had read somewhere that they have more pectin in them, and that helps with the setting /thickening process. The recipe I used called for 3-1/2 pounds Concord grapes, which turned out to be about 10 cups.
The recipe I followed is very simple; it uses no store bought pectin. The only ingredients in this jam are grapes, sugar and water. I do not have any fancy cookware, I just used a 20 qt stainless steel pot to cook it in, a stainless steel colander with a potato masher to remove the cooked skins and seeds. To process the jars, I used a large, 20 qt pot with a rack and lid with boiling water to seal them.
3-1/2 pounds Concord grapes
2 cups water
4-1/2 cups sugar
Wash and stem grapes. Measure 10 cups. Remove skins from half (5 cups) of the grapes; set aside. Save the skins to add later on.

They popped right out! Make sure to catch all the juice and add it to the stock pot.

5 cups of skinned grapes and juice.
In an 8- or 10-quart pot combine the skinned and whole grapes.

Press grapes through a sieve discard seeds and cooked skins.
Or you can put them through a ricer or a Foley mill. 
Measure 3 cups of strained pulp; return to pot. Stir in the uncooked grape skins and water.

Cook, covered, for 10 minutes. Uncover; stir in sugar. Bring mixture to a full rolling boil, stirring often. Boil, uncovered, for about 12 minutes or until jam sheets off a metal spoon. This is where it gets tricky. It took me about 25 minutes before my jam would sheet off the spoon. Which means, dip a clean metal spoon in the jam. Hold spoon sideways and when 2 drops run down and meet into one drop, then it is ready.

Remove pot from heat; quickly skim off foam with a metal spoon
.
Ladle at once into hot, sterilized half-pint jars, leaving a 1/4-inch head space. Wipe jar rims and adjust lids.
Process in a boiling-water canner for 5 minutes.

Remove jars and cool on a rack until set, about12 to 24 hours. Store in a cool, dry place for up to one year.
Makes 6 half-pints or about 12 4oz jelly jars. Perfect for gifting.
The finished product! It tastes as good as it smells and looks!

It came out pretty thick, as I was having problems with my sheet test, but we prefer it this way.

Slathered on some of the bread the Amish brought us.

G approves! This kid is picky, he hates everything! But he loves the grape jam he helped Mommy make :)

Seriously, the store bought stuff can't even compare. I hate commercial jelly and jams, I usually eat my peanut butter sandwiches with honey or fresh strawberries or bananas. But this stuff rocks! Try it on hot biscuits, pancakes or waffles. To die for. I can't wait to give these as gifts to my family and friends!
Here is the recipe:
Grape Jam
Ingredients
3-1/2 pounds
2 cups water
4-1/2 cups sugar
Directions
1. Wash and stem grapes. Measure 10 cups. Remove skins from half of the grapes; set aside.
2. In an 8- or 10-quart pot combine the skinned and unskinned grapes. Cover and cook 10 minutes or until very soft.
Press grapes through a sieve; discard seeds and cooked skins. Measure 3 cups of strained pulp; return to pot. Stir in the uncooked grape skins and water. Cook, covered, for 10 minutes. Uncover; stir in sugar. Bring mixture to a full rolling boil, stirring often. Boil, uncovered, for about 12 minutes or until jam sheets off a metal spoon.
3. Remove pot from heat; quickly skim off foam with a metal spoon
.
4. Ladle at once into hot, sterilized half-pint jars, leaving a 1/4-inch head space. Wipe jar rims and adjust lids.
5. Process in a boiling-water canner for 5 minutes. Remove jars and cool on a rack until set, about12 to 24 hours. Store in a cool, dry place for up to one year.
Wednesday, June 22, 2011


Subscribe to:
Posts (Atom)